
How to attach photos or files to an email on iPhone or iPad
The iOS devices that we carry around with us every day make for excellent portable devices to access our email messages on the go and respond to them quickly if needed. All the photos we take using our iPhones or iPads, all the images and GIFs that we save to our Camera Roll, and all the files we download on them sit neatly stowed away, unless you need to attach them to an email that you're sending out.
Although iOS apps are pretty easy to use in general, knowing how to attach photos or files to an email on iPhone or iPad isn't always obvious. This is especially true as every app designer tries to implement their own flow, complicating things. So let's take a detailed look at how to attach photo attachments, videos, or files to email on iPhone or iPad.
Before we learn how to email photos or videos from iPhone or iPad, it's important to learn the difference between emailing photos and videos on iOS, and emailing files or attachments on iOS.
Photos & Videos (Camera Roll) vs. Files as Attachments (Files.app)
There is a stark difference between how iOS handles photos & videos on your iPhone or iPad, and how it handles your files. You see, by default, any photos or videos you take using the iPhone or iPad camera are stored in the Camera Roll on iOS. The Camera Roll is a fully-managed library of sorts - you don't have to manually save your photos or videos, iOS handles that automatically for you. There's no way to manually locate the file of a photo, video, or screenshot stored in the Camera Roll.
On the other hand, iOS now offers the Files.app that lets you store, move, copy, delete files on your iPhone or iPad, just as you would on your Windows PC or Mac. The Files.app on iOS doesn't just show you files stored locally on your device, but you can also configure third-party online storage accounts such as Google Drive, Dropbox, OneDrive or Box, so that you can access files stored on the cloud as well.
Understanding this difference between the two is important, because the process of attaching photos & videos to emails on iPhone or iPad differs from the process of attaching files as attachments. So let's first take a look at how to attach photos & videos to email on iOS.
How to Attach Photos to Email on iPhone or iPad
This method explains how to attach photos & videos directly from your Camera Roll to an email using Spark.
- Download & Install Spark Mail app from the App Store.
- After you've set up your email account, compose a new email in Spark.
- Tap on the little 'Photo' icon just above the keyboard.
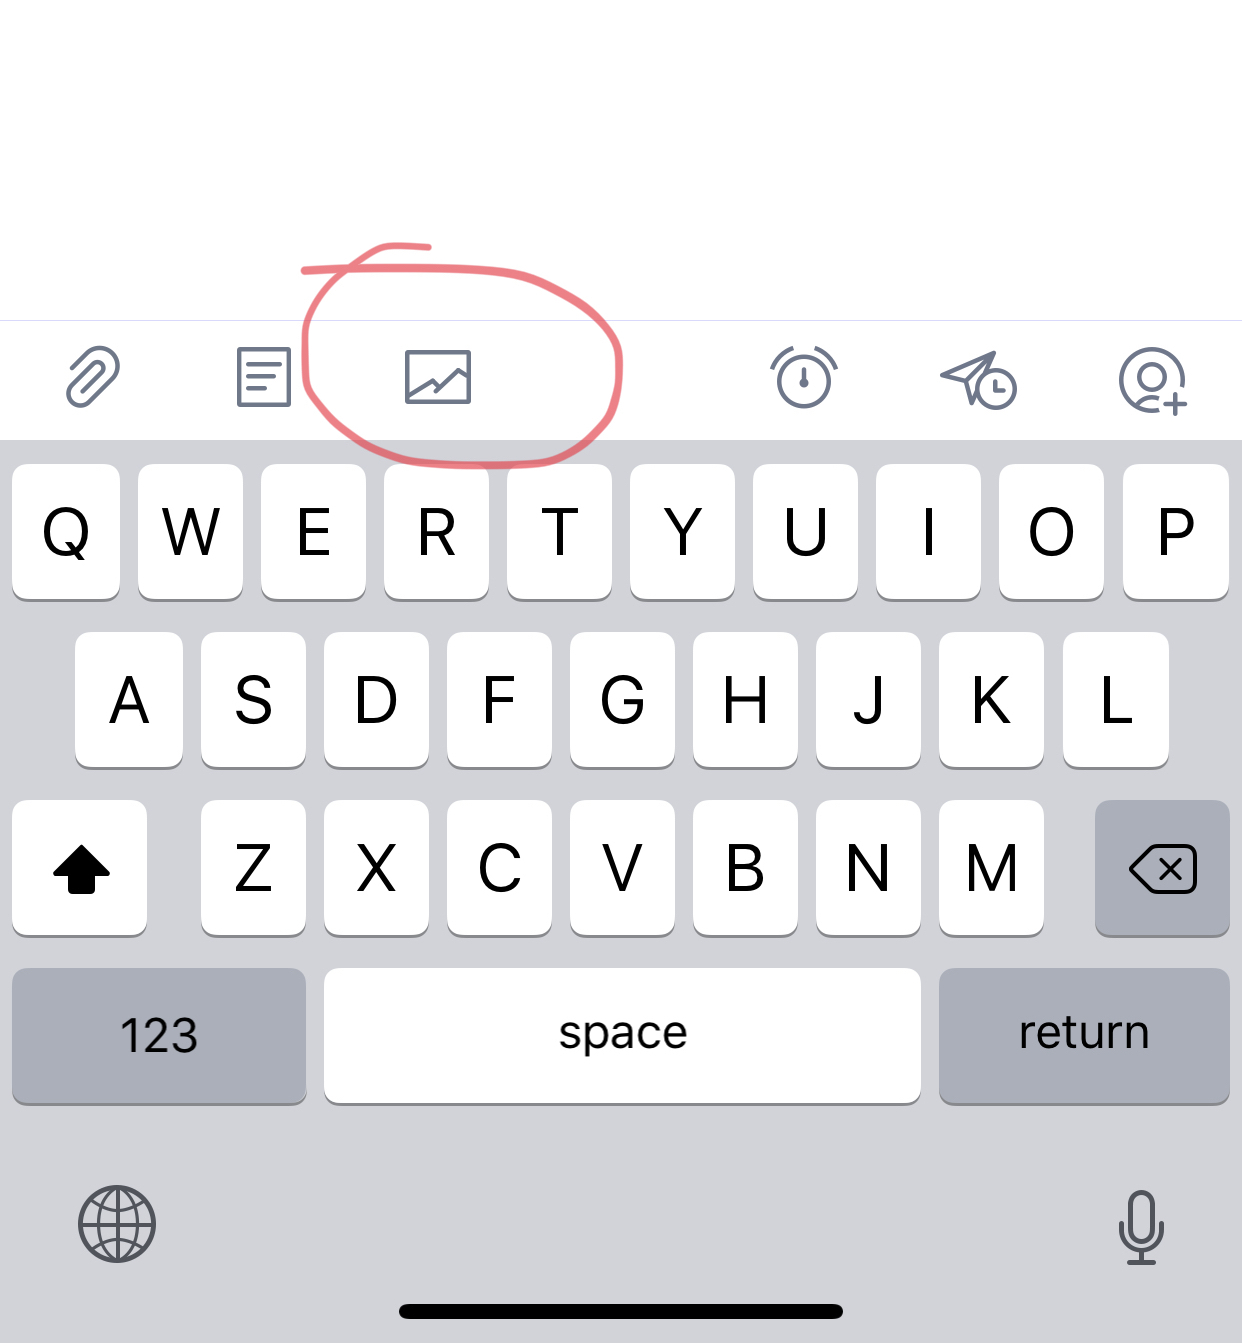
- Spark will instantly open your Camera Roll, allowing you to view and attach photos or videos to the email you are composing in Spark.
- Tap on the photos you want to select, then tap on the 'Attach' button.
Your email with your attached photos and videos is now ready to be sent.
How to Attach Files to Email on iPhone or iPad
This method explains how to attach files as attachments to email on iPhone or iPad using Spark.
- Download & Install Spark Mail app from the App Store.
- After you've set up your email account, compose a new email in Spark.
- Tap on the little file attachment icon just above the keyboard.
- Tap on the 'Files' icon to attach a file stored on your iOS device.
- To attach a file that exists on your cloud account, tap on 'Add Service' to add your Box, Google Drive, Dropbox or OneDrive accounts.
- Navigate to where your file is stored and tap to select and attach the file.
Your email with your file attachment is now ready to be sent.
Spark makes it easy to attach photos, videos, and files stored on the cloud to any email on your iPhone or iPad. With a few simple taps, you can send an email with photos or videos on your iPhone or iPad, even when you're on the go.
Spark Mail app makes the email experience a lot more interesting and easy. Download Spark for Free and start loving your email again.