
How to add an email signature on iPhone or iPad using Spark Mail App
Email signatures are an integral part of any email, but they're also an often overlooked aspect of any email. Your email signature conveys important contact information about you, so it's a good idea to have an email signature that not just looks good, but is also able to convey the information that you want the other party to know about.
When using Spark Mail app on your iPhone or iPad, you might have set up multiple email accounts that you use on your device. Let's say you have one personal email account and two professional email accounts set up on your iOS device. Let's take a look at how to set up multiple email signatures on your iPhone or iPad, so that you can save your time and reduce the hassles when you email someone.
How to Set Up Email Signatures on iPhone or iPad using Spark Mail app
- Download and launch Spark Mail app on your iPhone or iPad device.
- Open the Sidebar menu on the left, and navigate to the Settings in Spark.
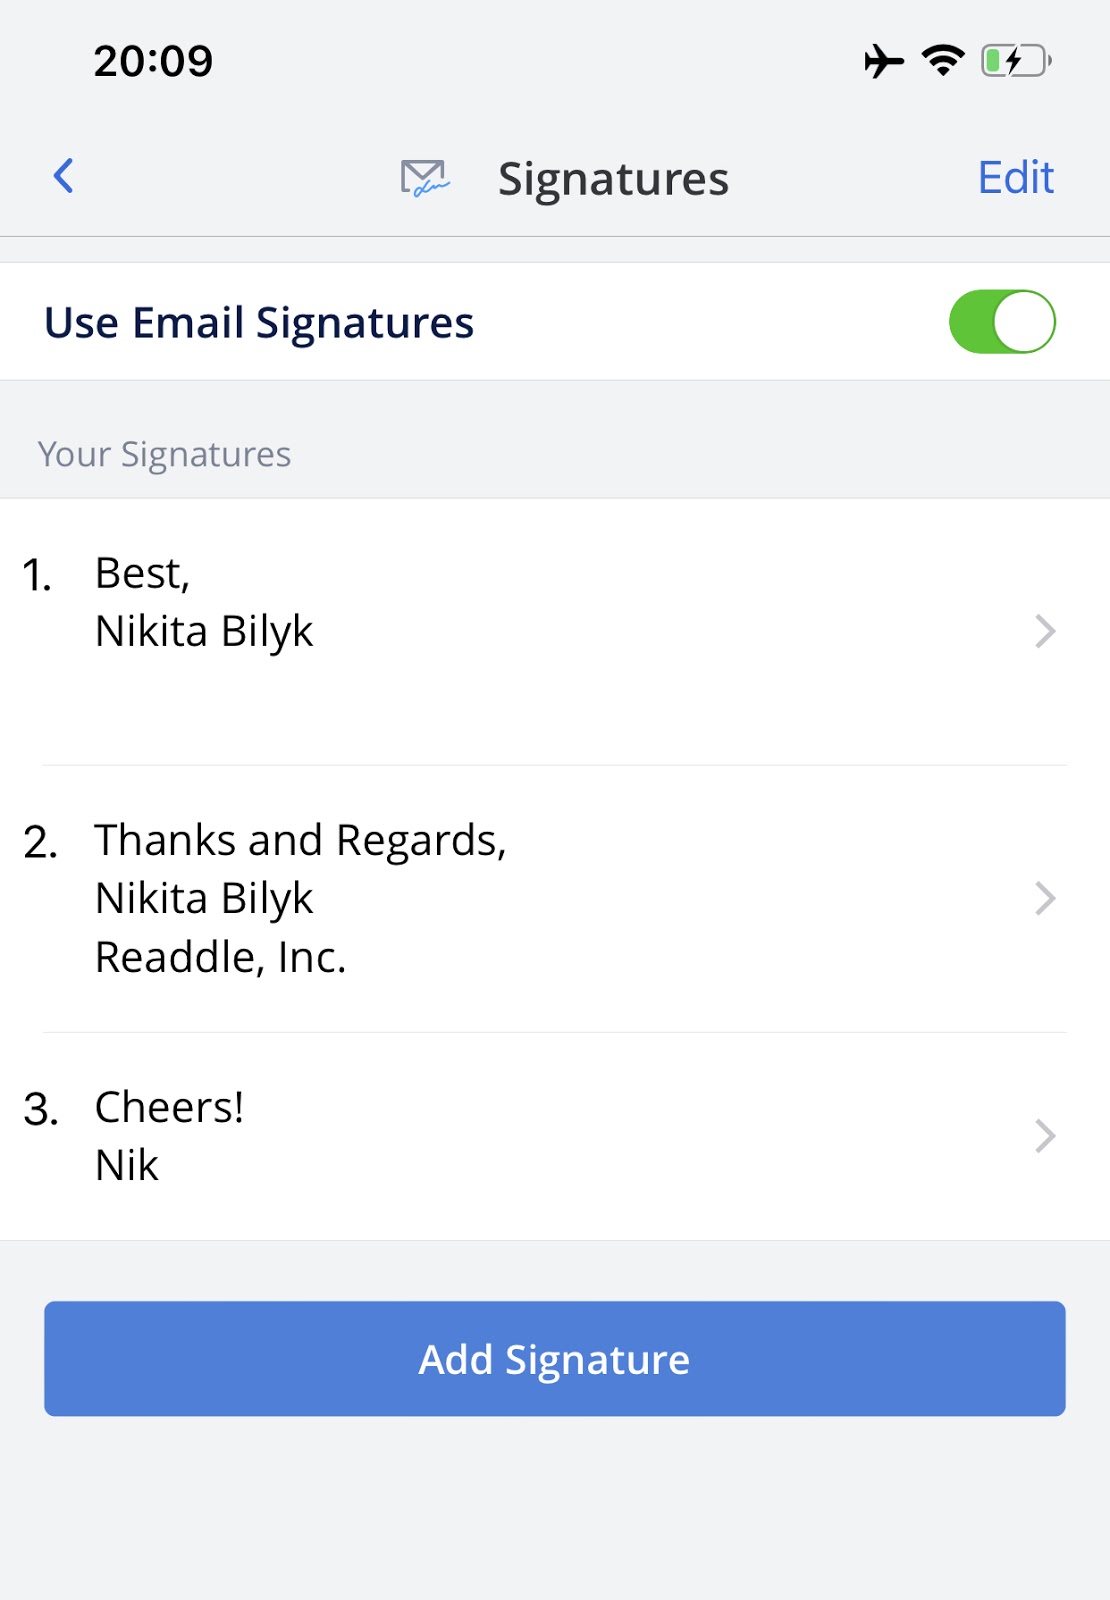
- Tap on the 'Signatures' option, and turn on the 'Use Email Signatures' switch.
- Now, tap on the blue 'Add Signature' button.
- Type in the text of your email signature.
- If you have the code for an HTML Email signature, switch to the 'HTML' tab and paste in the html code there.
- Before you hit Save, scroll down and tap on the 'Set as Default for…' option.
- Choose which email account you'd like to use this email signature with, then tap on 'Save' to save your email signature.
That's how easy it is to create your iPhone email signature using Spark. To create multiple email signatures on iPhone or iPad, follow Steps 4 to 8 again and Spark will automatically handle your email signatures for each account. You can create multiple email signatures for every email account configured in Spark.
As Spark is available for iPhone, iPad, and Mac, it automatically syncs your email signatures across all your devices, so you don't have to manually create them on every device you own. Once you create an iPad email signature, it'll be copied over to your iPhone and Mac too.
How to Use Multiple Email Signatures on iPhone or iPad
So far, we've seen how to create and set up email signatures in Spark Mail app on your iPhone and iPad. Now, let's see how you can switch between multiple email signatures on your iOS device, when you are sending an email.
- Launch Spark and tap on the blue Compose Mail button at the bottom.
- Fill out the To, Subject, and Email body with your content.
- Under the email body, you'll see the default email signature that you set up in the steps detailed above.
- To switch between the other email signatures on your iPhone or iPad, simply swipe left or right.
- If needed, you can make edits to your email signature within this new email screen.
- When you're done, tap the paper rocket icon to send out the email.
Spark Mail app makes it super easy to use multiple email signatures on iPhone or iPad and switch between them with a simple swipe gesture. Using this gesture, all your email signatures are easily accessible, and can be quickly previewed along with the email content. This way, you can pick the best suitable iPhone email signature and make edits to it just before sending the email out.
Spark Mail app makes the email experience a lot more interesting and easy. Download Spark for Free and start loving your email again.